

Manage access
Create a client
Create a named client under the appropriate tenant and save it in User Management.
Clients are used to group users and control access within the platform. You must have the appropriate administrative permissions to complete this process.
Note: You must have the appropriate permissions to access User Management. If you do not see this option, contact your platform administrator.
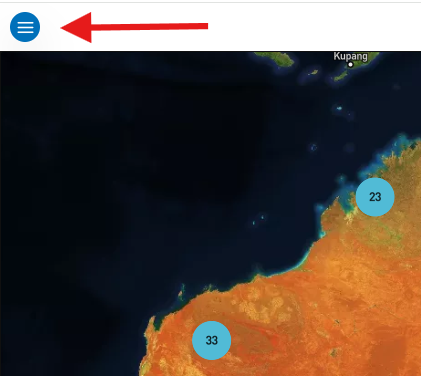
- Select the menu icon (three horizontal lines) in the top left-hand corner of the screen to open the navigation menu.
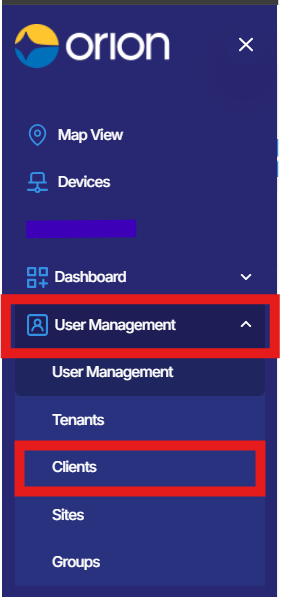
- Click User Management, then select Clients.
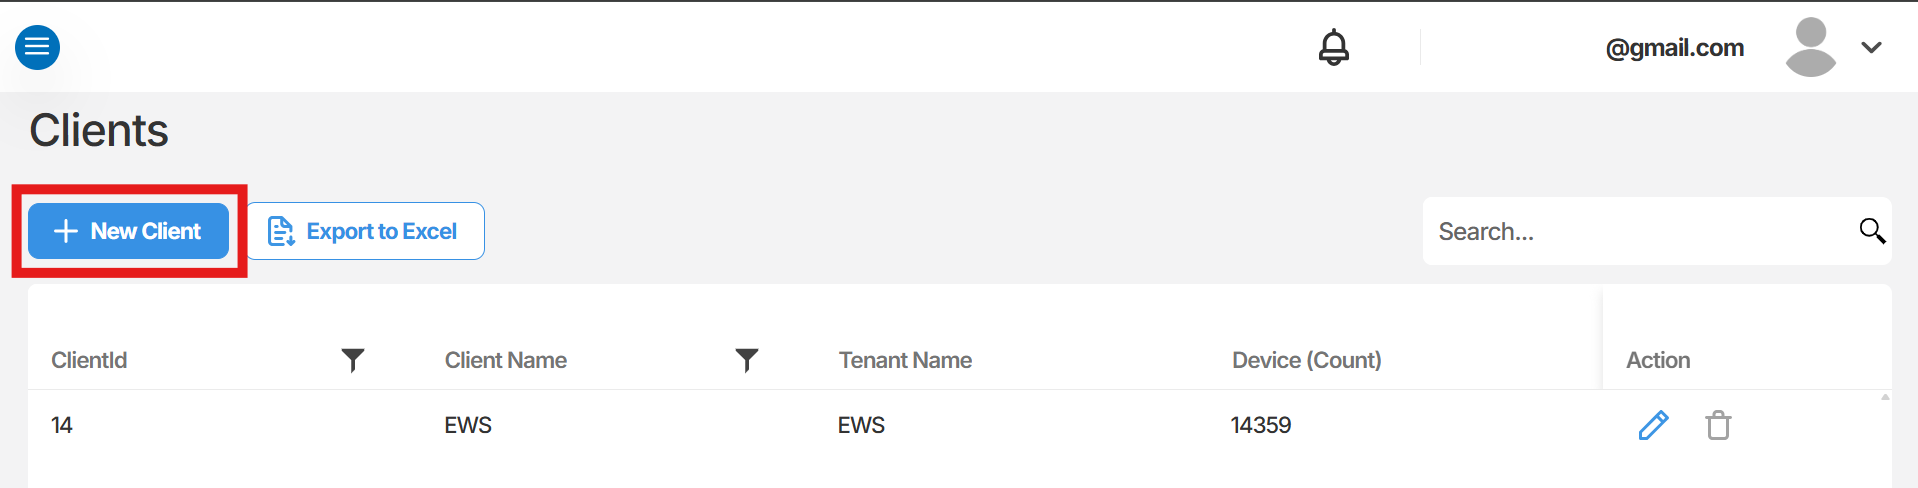
- Once the Clients page loads, click + New Client.
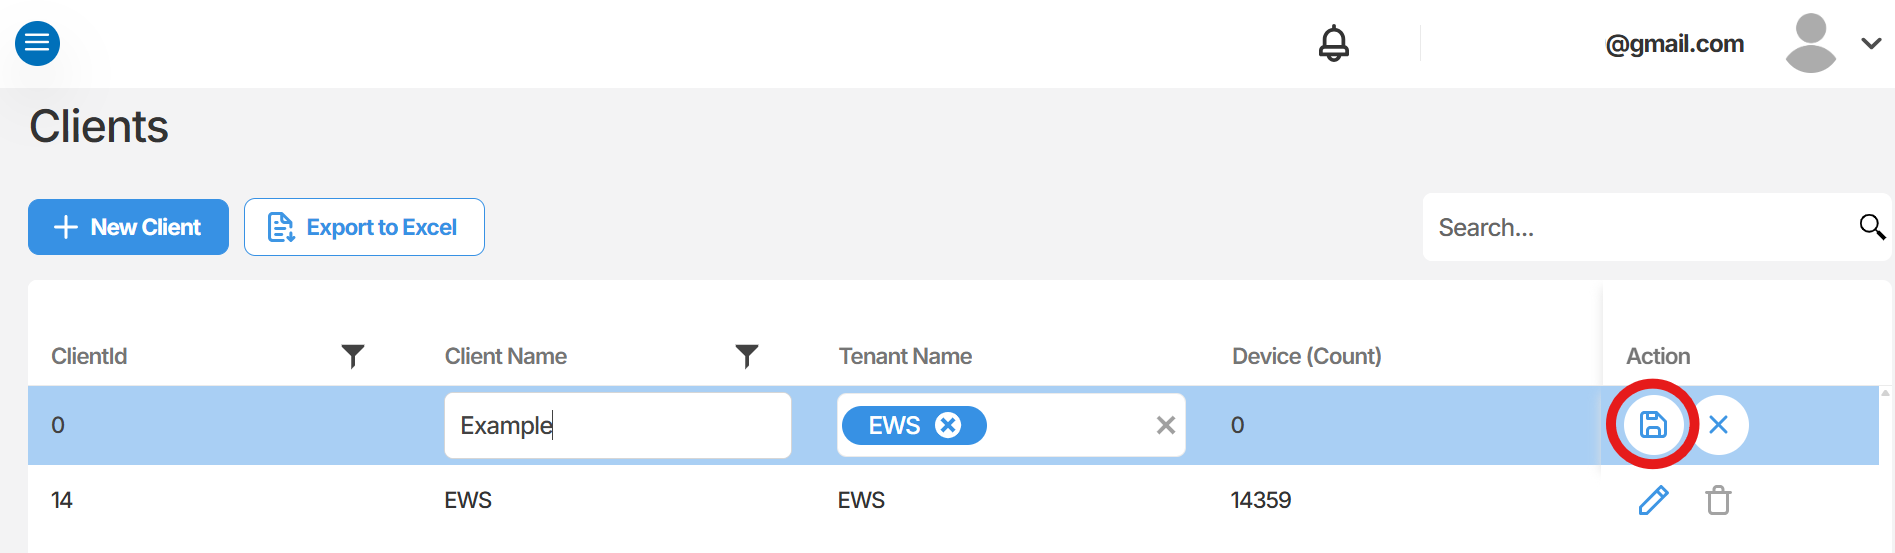
- A new row will appear at the top of the Client list.
- Enter a name in the Client Name field.
- Use the Tenant Name dropdown to select the appropriate tenant.
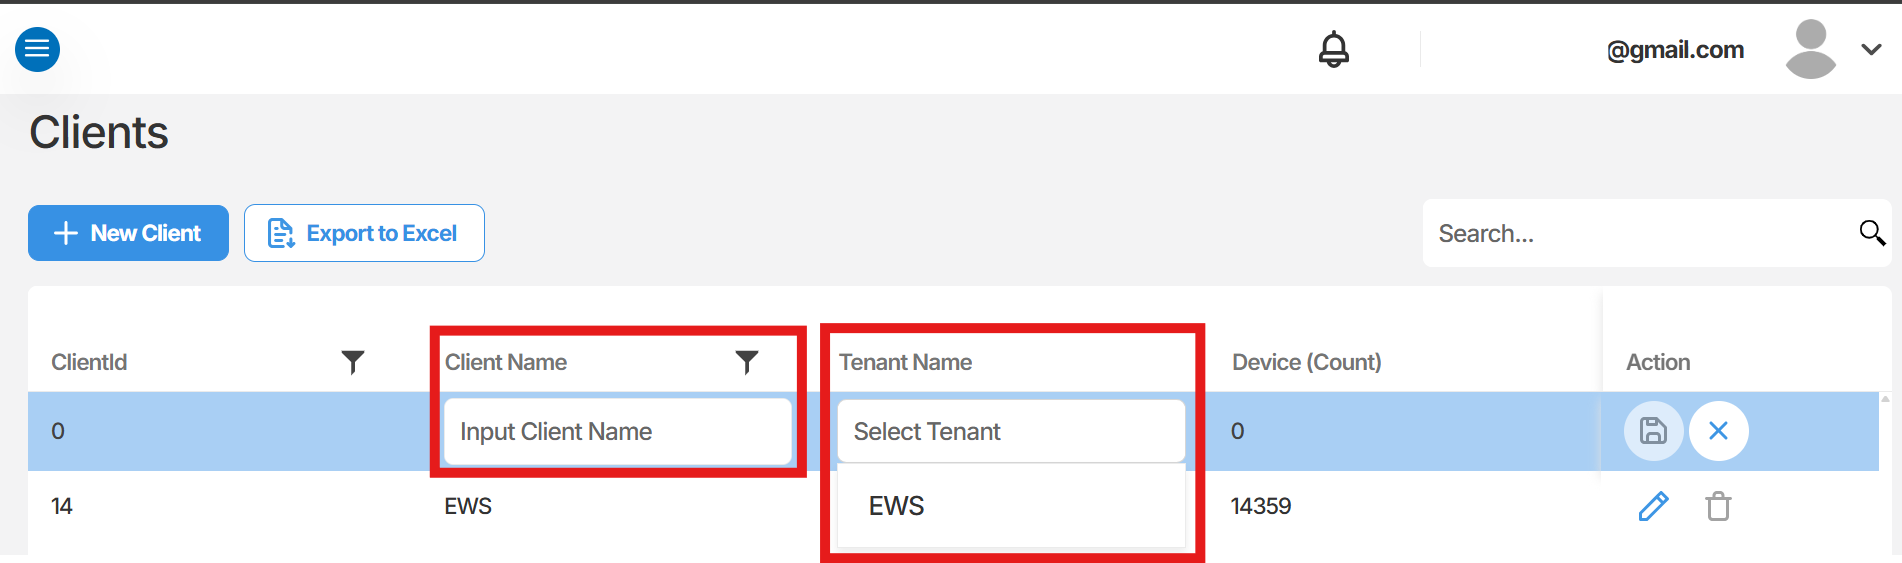
- Click the Save icon to confirm.
Summary
Section titled “Summary”This article covered how to create a new client in Orion Data using the User Management section. You entered a client name, assigned a tenant, and saved the record. Clients allow you to organise users and manage access across the platform.
Next Steps
Section titled “Next Steps”- Assign users to the new client
- Review role and permission settings for the client
- Explore other User Management options such as inviting new users
Related articles
Section titled “Related articles”- Managing users in Orion Data
- Understanding roles and permissions
- User Management overview