

Configure alarms
Configure a sensor alarm
Set an alarm condition, consecutive-reading count, reset type and notification content, then save it.
This article walks through the alarm configuration wizard for an individual device. If you do not have permission to set up alarms, contact your Tenant Admin or the EWS Australia team.
Navigating to the Alerts tab
Section titled “Navigating to the Alerts tab”Sensor alarms are configured from within an individual device. To get there:
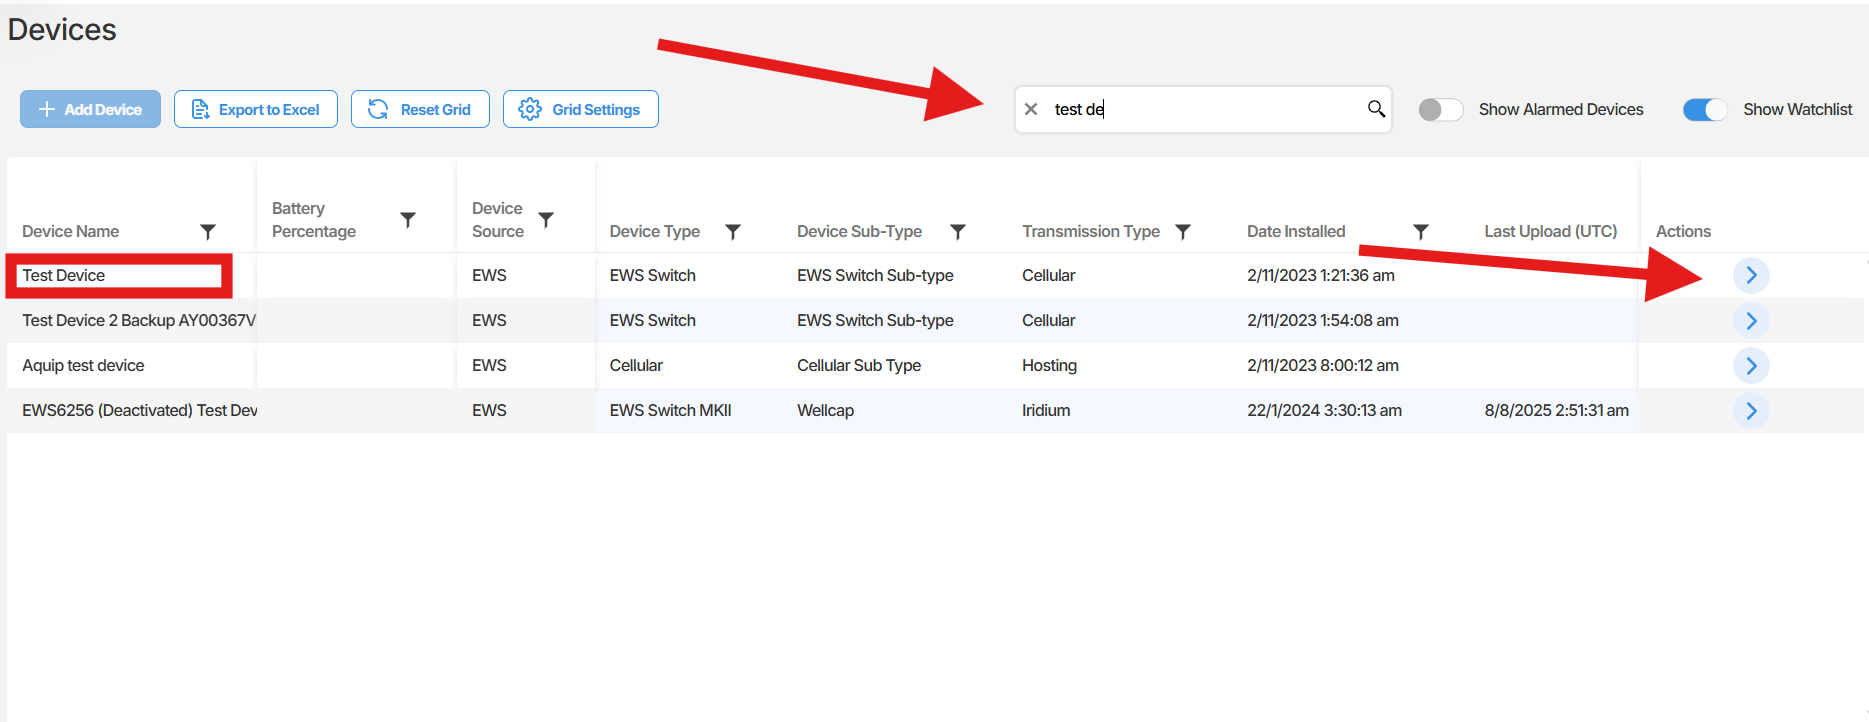
- Open the Device Management section from the main navigation.
- Locate your device using the search bar. You can search by serial number or IMEI number.
- Click the right arrow on the device row to open its configuration page.
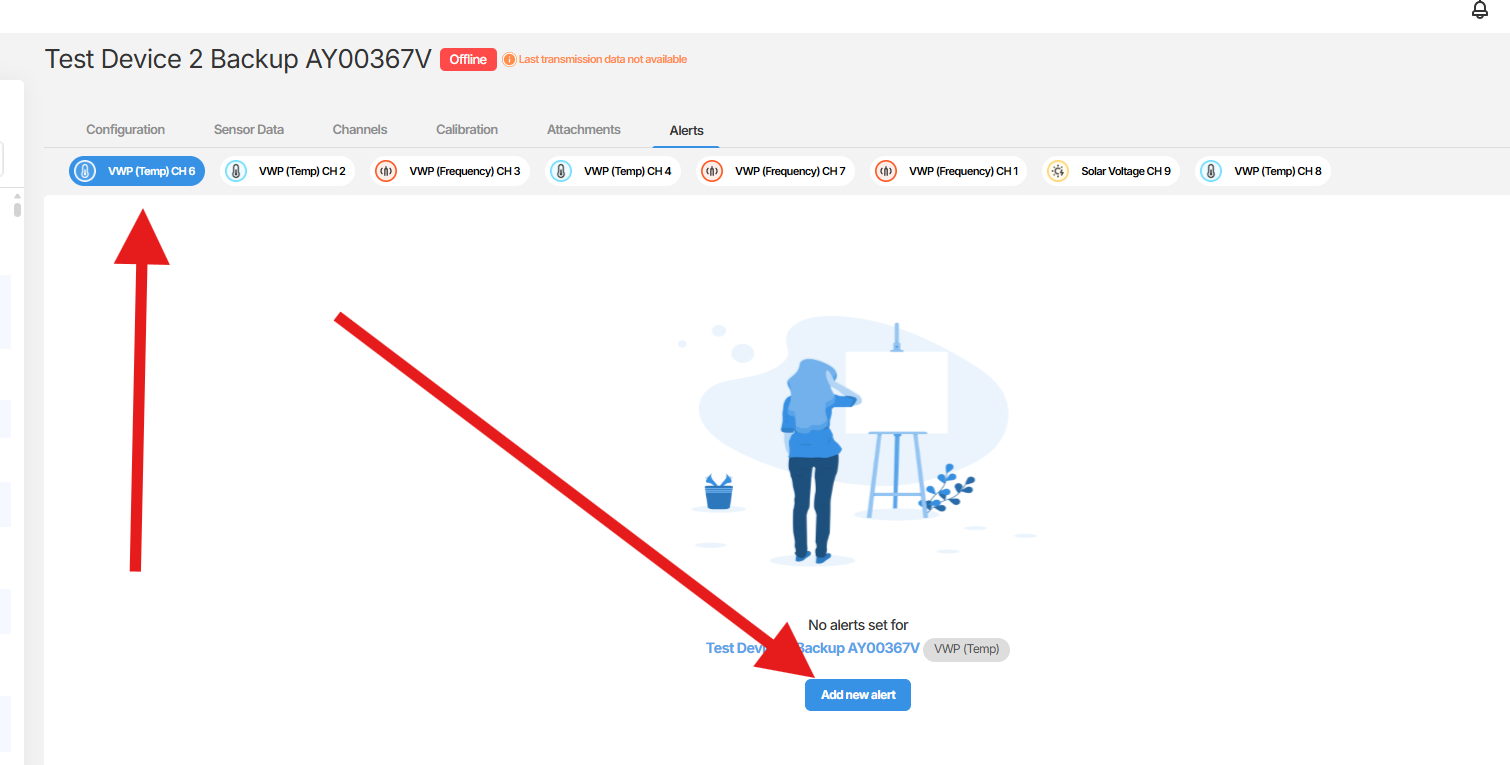
- Select the Alerts tab. This is the sixth tab along the top of the device configuration page.
Adding a new alarm
Section titled “Adding a new alarm”- On the Alerts tab, click the Add New Alert button. The alarm wizard will open.
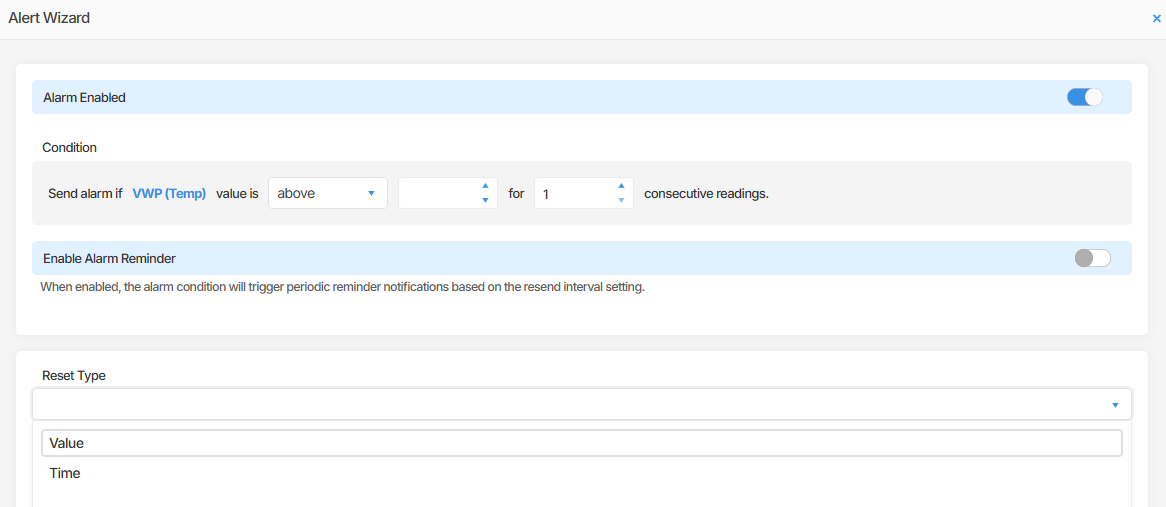
- The Alarm Enabled toggle is turned on by default. Leave this on to activate the alarm immediately after saving.
Configuring the alarm condition
Section titled “Configuring the alarm condition”The condition defines when the alarm will trigger based on the sensor’s reported value.
- From the channel selector, choose the sensor channel you want to monitor.
- Set the condition type. The available options are:
-
- Above a specified value
- Below a specified value
- Between two specified values
- Enter the threshold value or values in the fields provided.
- In the Consecutive Readings field, enter the number of consecutive readings that must meet the condition before the alarm triggers. Enter 1 if you want the alarm to trigger on the first reading that meets the condition.
 Setting the reset type
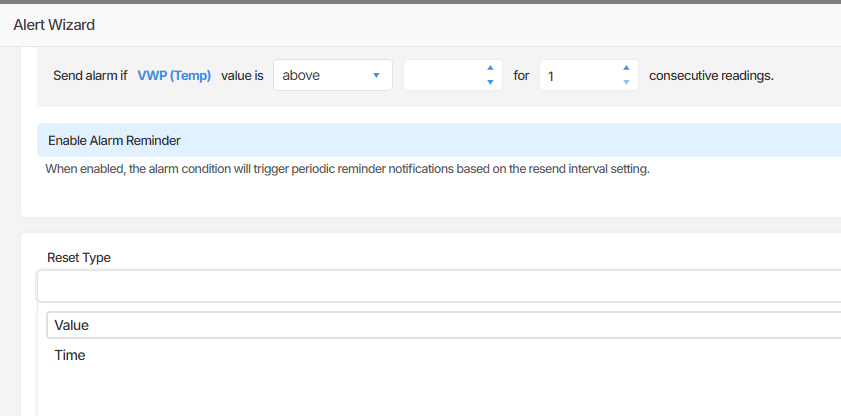
The reset type controls when the alarm clears after it has been triggered.
- From the Reset Type picklist, select either Value or Time.
-
- Value: The alarm resets when the sensor reading returns to the value you specify. Enter this value in the field provided.
- Time: The alarm resets after a defined period. Select the duration and unit (minutes, hours, or days) from the picklist.
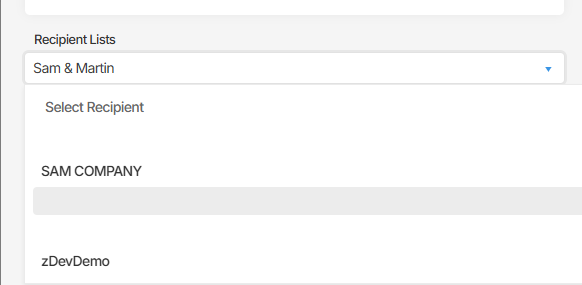
Selecting an alarm recipient list
Section titled “Selecting an alarm recipient list”The recipient list determines who is notified when the alarm triggers.
- In the recipient list section, select an existing list from the picklist if one has already been configured.
Writing the notification content
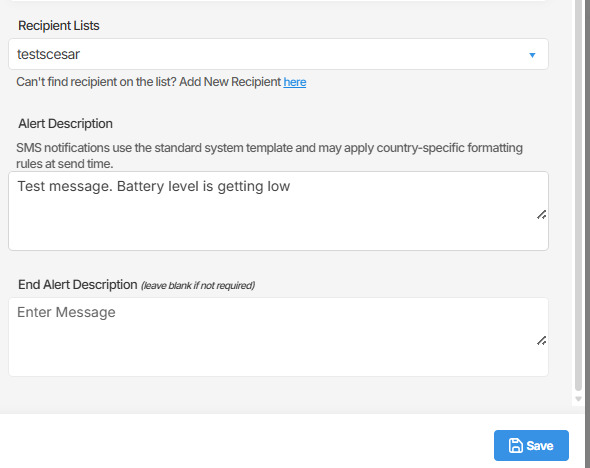
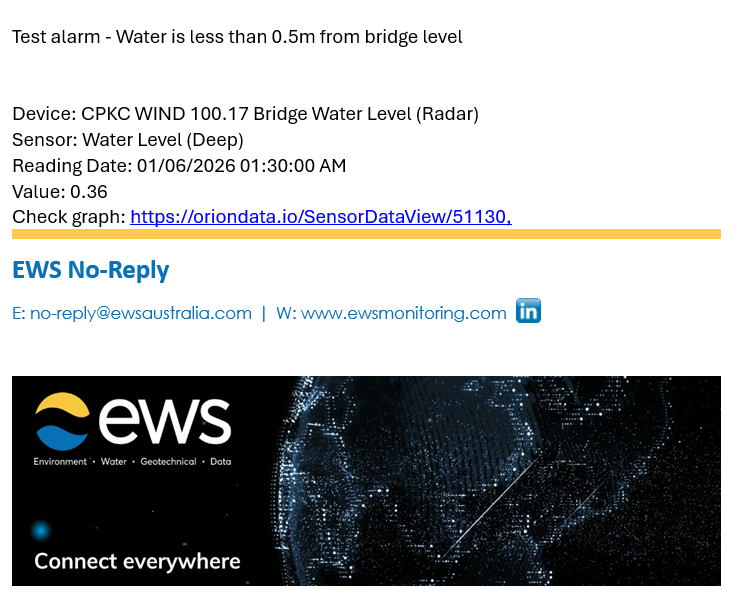
Section titled “Writing the notification content”When an alarm triggers, recipients will receive a notification containing the device name, the reading date, the value that triggered the alarm, and a link to a graph of the sensor data. You can add further context using the description fields below.
- In the Alert Description field, enter a clear description of the alarm so that recipients can quickly identify which device and sensor the alert relates to, and what condition has been met.
- In the End Alert Description field, enter a message to send when the alarm clears. Leave this blank if no end alert message is required.
Saving the alarm
Section titled “Saving the alarm”Once all fields are configured, save the alarm to activate it. The new alarm will appear in the list on the Alerts tab.
Summary
Section titled “Summary”This article covered how to navigate to the Alerts tab on a device configuration page and use the alarm wizard to set up a sensor alarm. You configured the trigger condition, reset behaviour, recipient list, and notification content. Sensor alarms can only be created by a Tenant Admin or the EWS Australia team.
Next Steps
Section titled “Next Steps”- Contact your Tenant Admin or EWS Australia to request changes to alarm configuration if you do not have admin access.
- Review the recipient lists available in your account to ensure the correct contacts are assigned to each alarm.
- Check the Alarm Centre to monitor alarm history and review past alert events.
Related articles
Section titled “Related articles”- Device list columns and export
- Understanding the Alarm Centre
- Navigating the Devices section in Orion Data