

Transform sensor data
Apply a calibration template
Select an existing calibration template, configure its inputs and apply it to a sensor.
Calibration templates provide a pre-built configuration structure that guides you through the required inputs, reducing setup time and the risk of misconfiguration. This process applies to any template available.
To access calibrations for a device, navigate to Devices > [select your device] > Calibrations.
DTW calibration
Section titled “DTW calibration”The DTW (Depth to Water) calibration template calculates a depth-to-water value from a raw water level sensor reading. It requires you to supply configuration values and select the relevant sensor during setup.
Applying the DTW calibration template
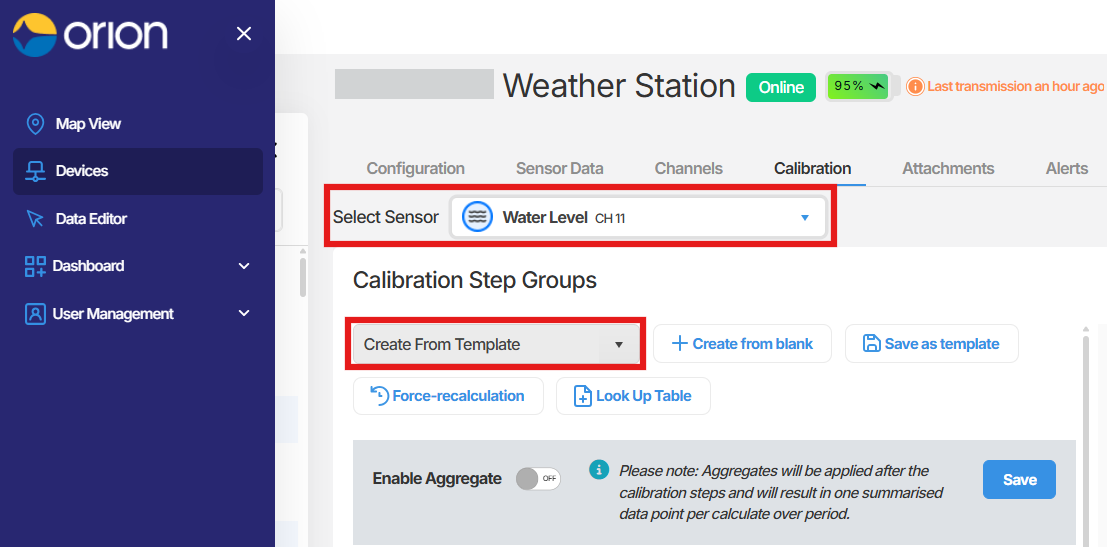
Section titled “Applying the DTW calibration template”- From the device’s Calibrations screen, Select the sensor, click Create From Template.
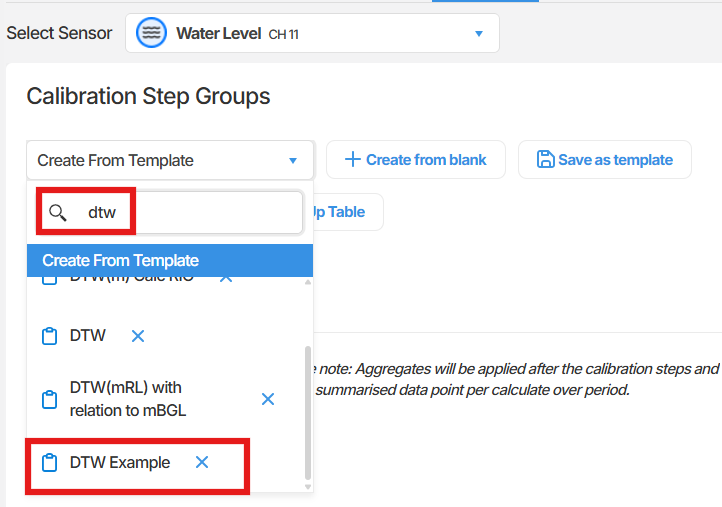
- In the template search drop-down, search for and select the DTW calibration template.
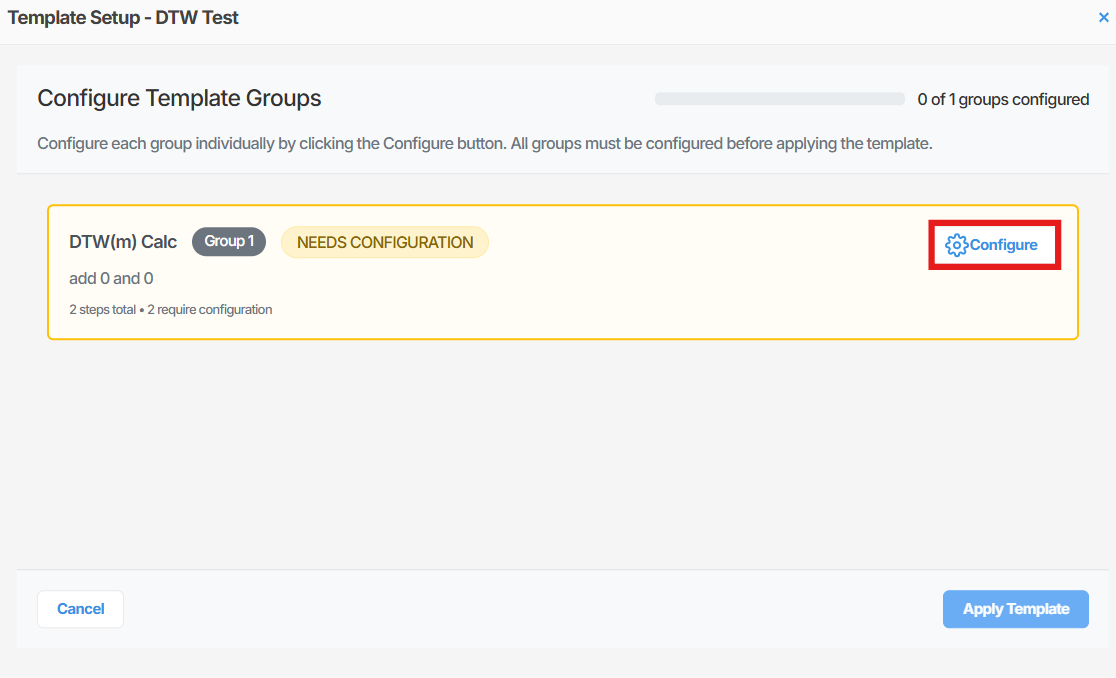
- The calibration sheet will open. You will see a yellow group labelled DTW(m) Calc with a status of NEEDS CONFIGURATION. Click Configure.
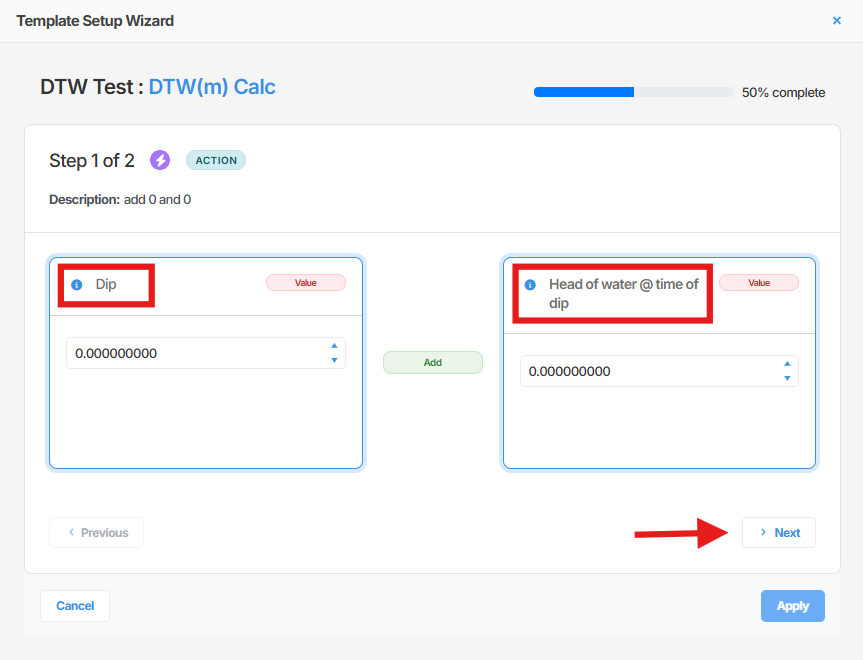
- A configuration pop-up will open. Fill in all fields marked with blue squares. Helper text is displayed at the top of the pop-up to guide you. Once all values have been entered, click Next.
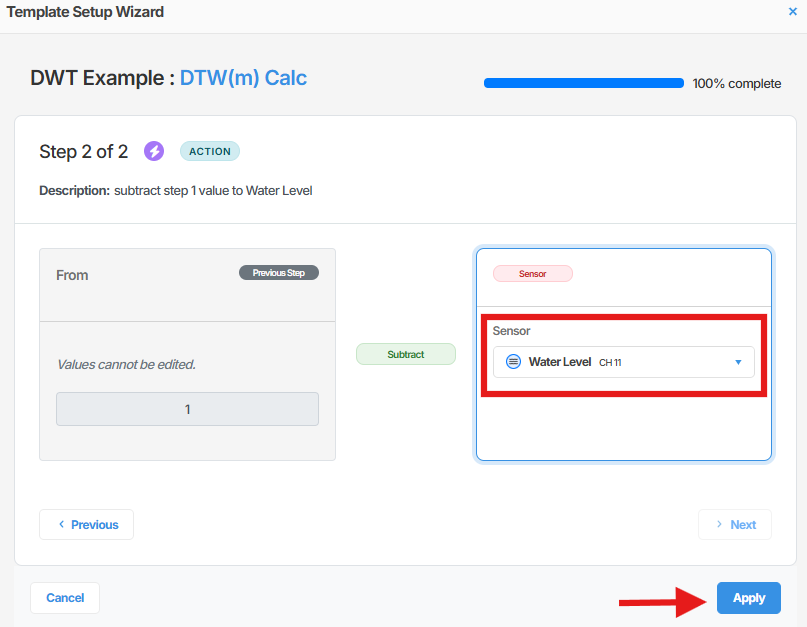
- On the next screen, select the sensor you are applying this calibration to. In most cases this will be the Water Level Channel. Click Apply.
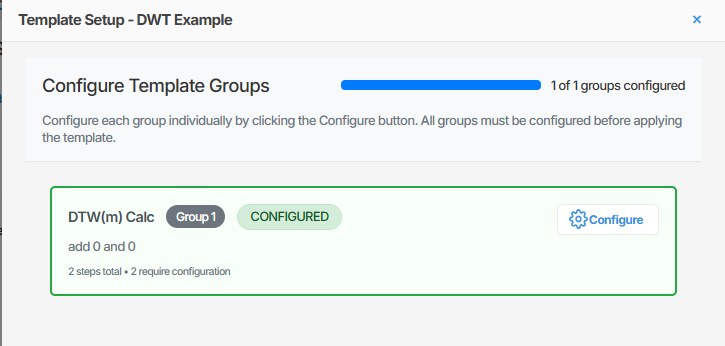
- You will be returned to the calibration sheet. Confirm that the fields you configured are now populated correctly.
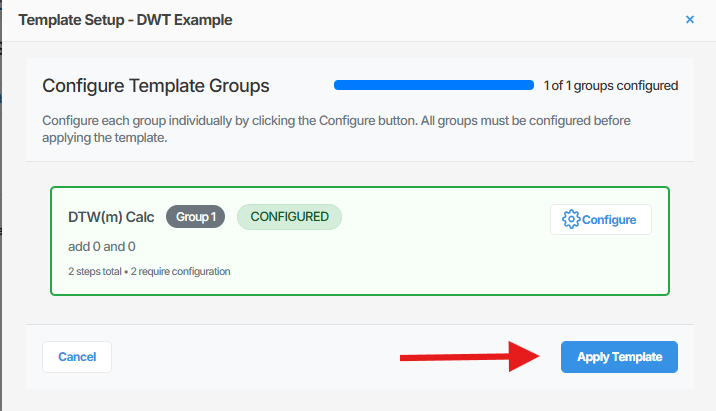
- Click Apply Template to finalise the calibration.
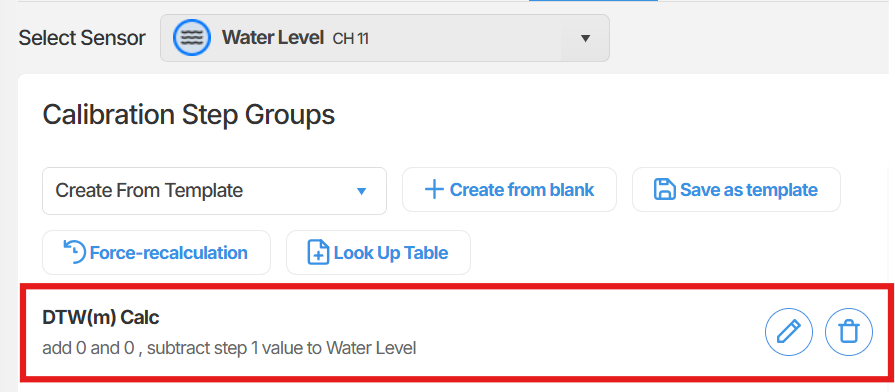
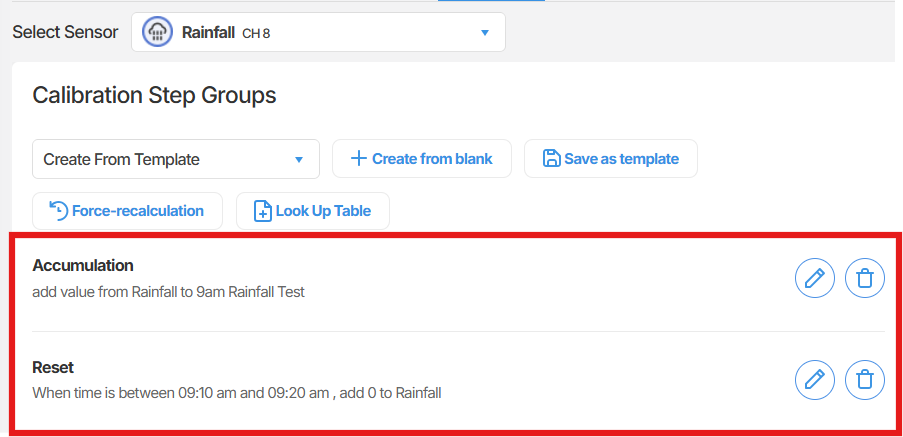
- You will be returned to the Calibrations screen. The DTW calibration will now appear in the list with Edit and Delete options available.
9am rainfall calibration
Section titled “9am rainfall calibration”The 9am Rainfall Calibration template calculates a daily accumulated rainfall figure, resetting at a defined time each day. It requires two separate configuration groups to be completed: an Accumulation group and a Reset group.
Applying the 9am rainfall calibration template
Section titled “Applying the 9am rainfall calibration template”- From the device’s Calibrations screen, click Create From Template.
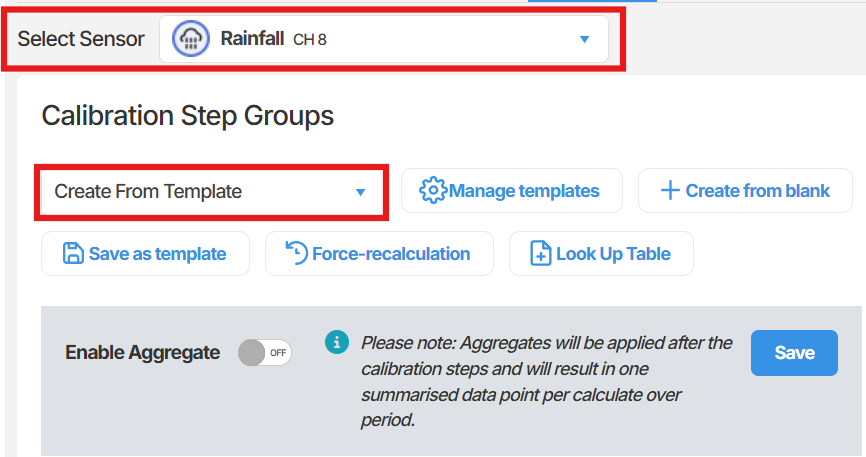
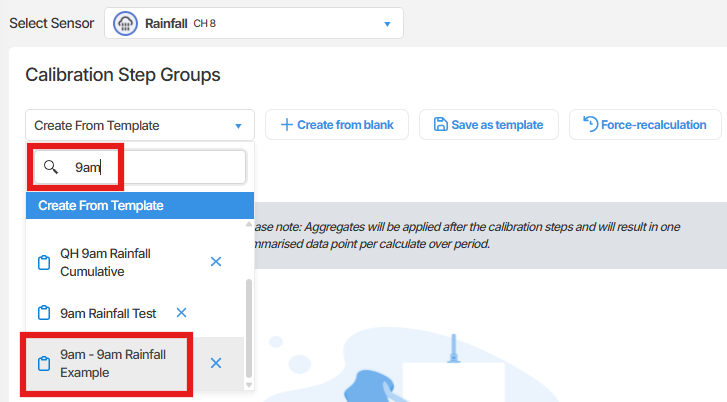
- In the template search drop-down, search for and select your 9am Rainfall Calibration template.
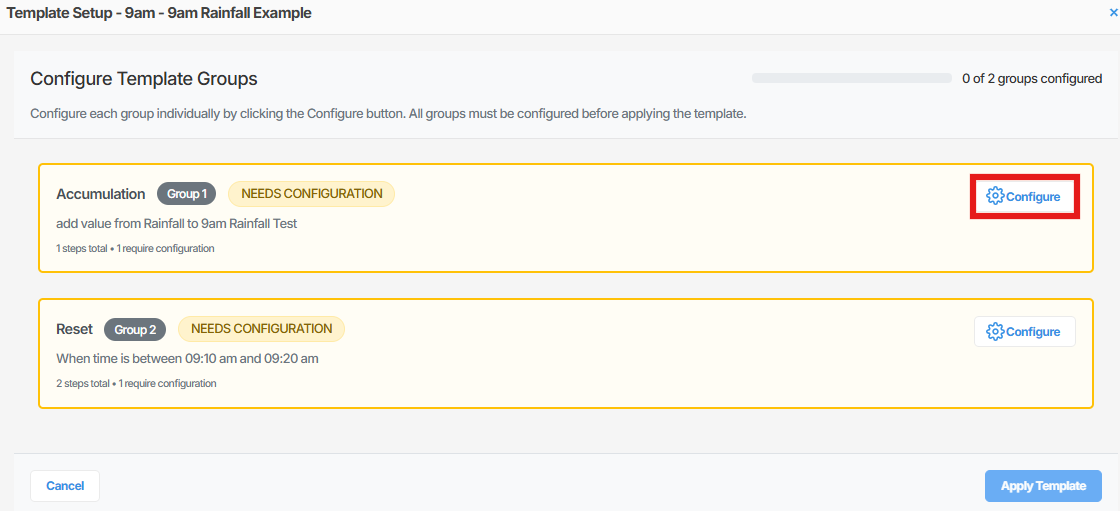
- The calibration sheet will open. You will see two yellow groups, both with a status of NEEDS CONFIGURATION. Begin with the first group, labelled Accumulation. Click Configure.
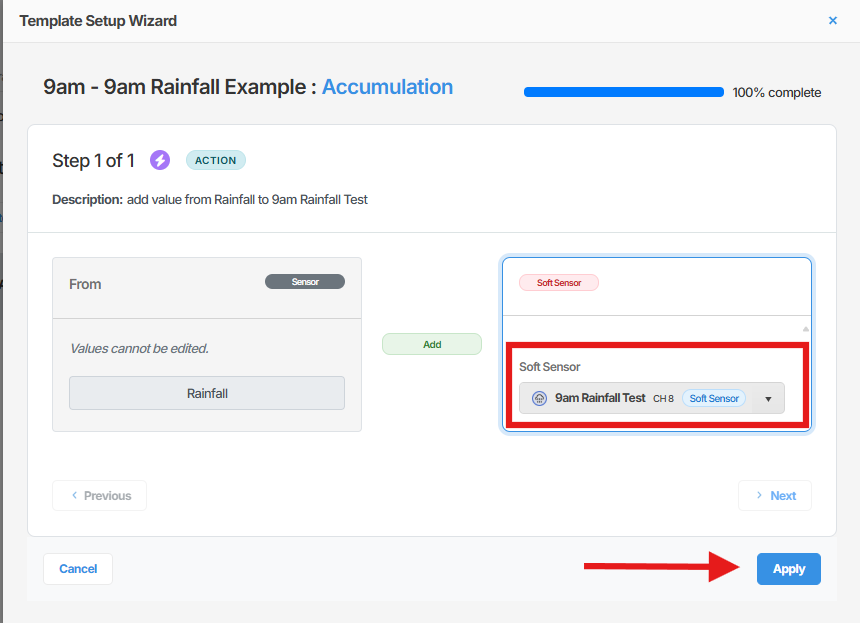
- A configuration pop-up will open. Using the drop-down box, select the soft sensor you are using to generate the calibration. Click Apply.
- You will be returned to the calibration sheet. The Accumulation group will now display as green, confirming that configuration is complete. Proceed to the second group, labelled Reset, which still shows NEEDS CONFIGURATION. Click Configure.
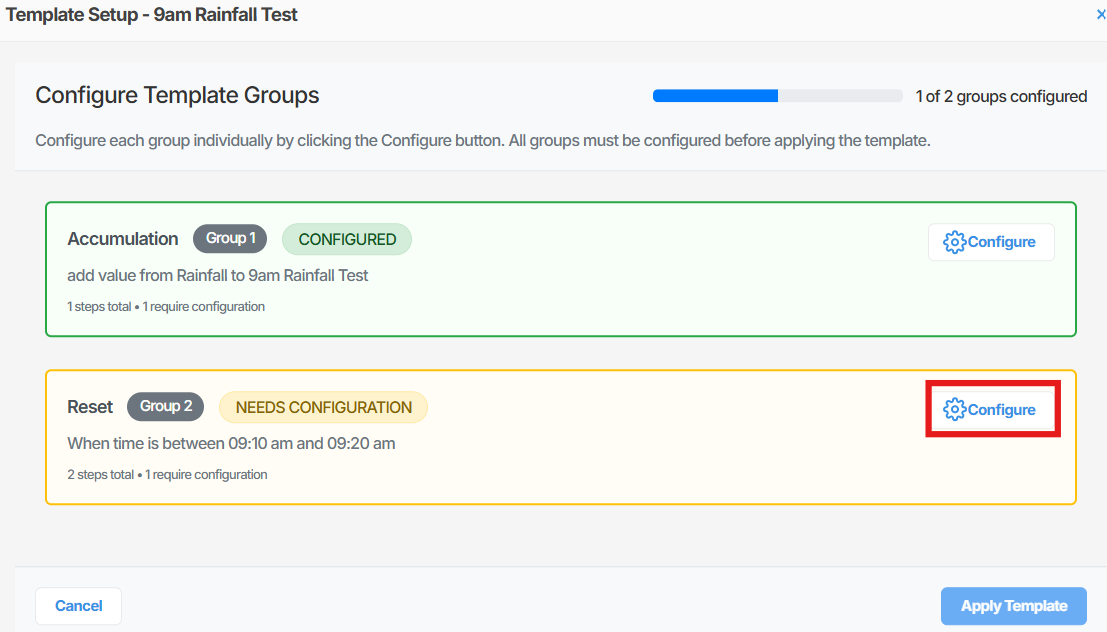
- In the Reset configuration pop-up, enter the start time and end time in the fields provided. Click Next.
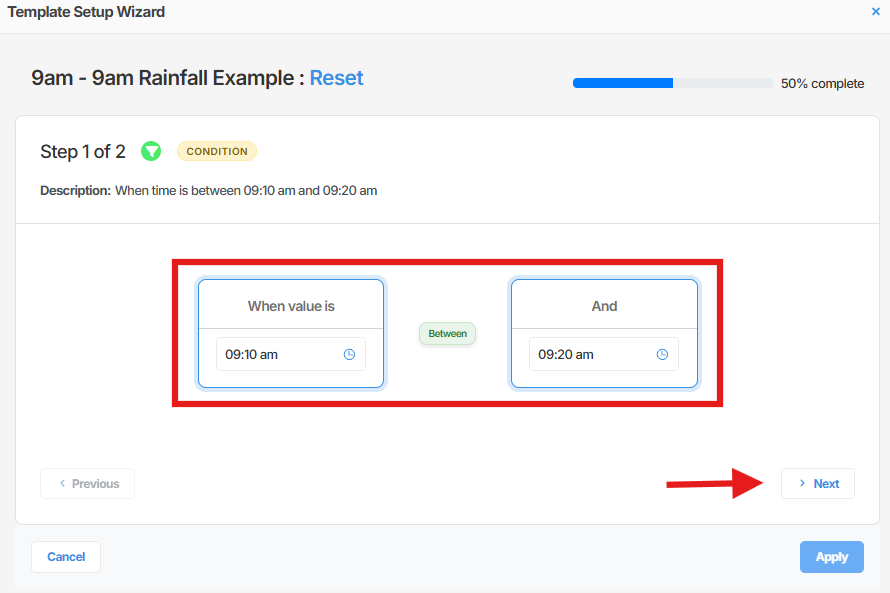
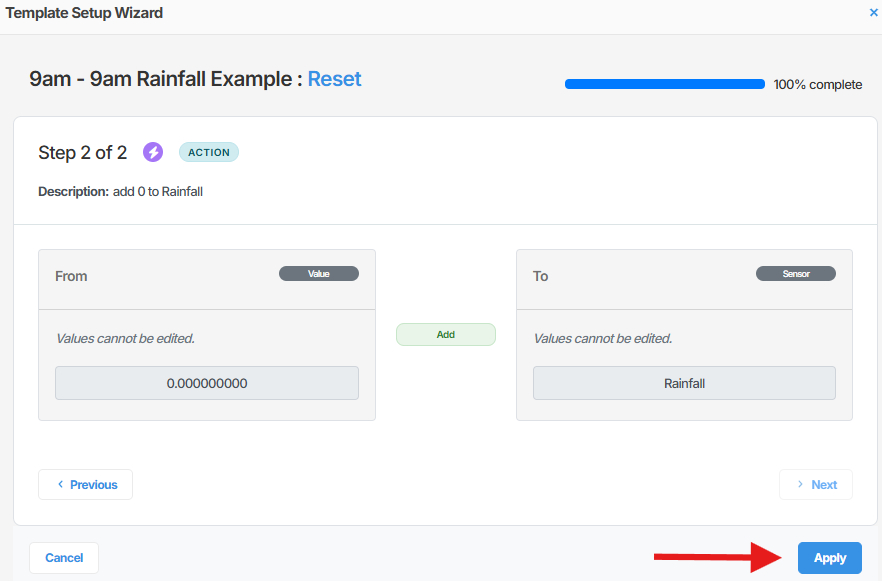
- The next screen requires no additional input. Click Apply.
- You will be returned to the calibration sheet. Both groups should now display as green, confirming all configuration is complete.
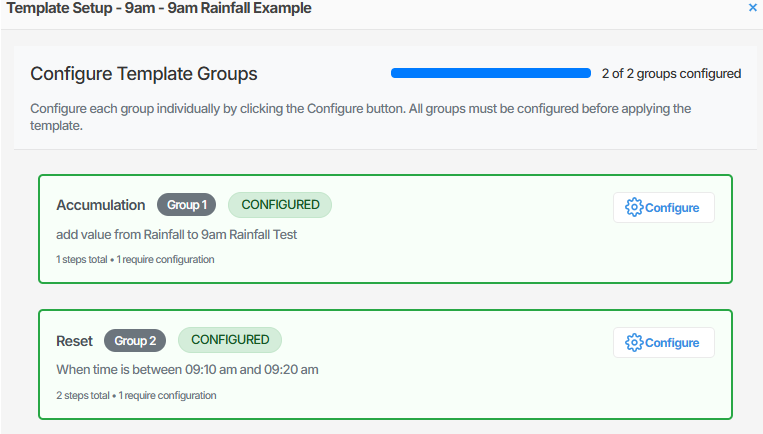
- Click Apply Template to finalise the calibration.
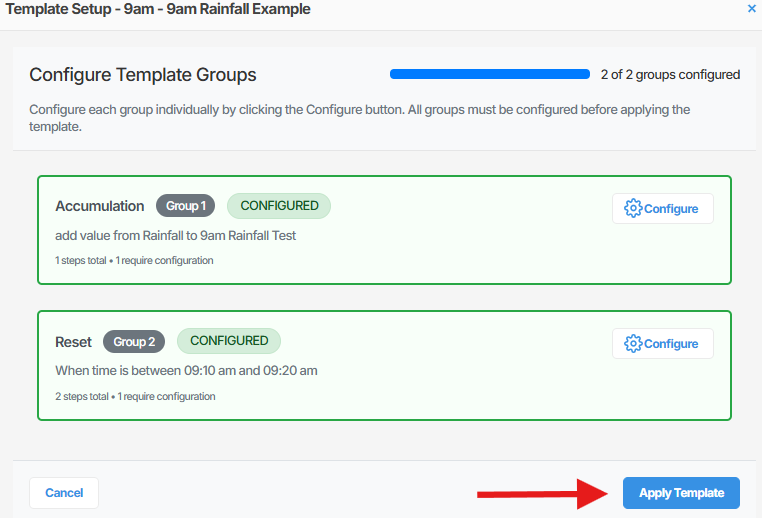
- You will be returned to the Calibrations screen. The 9am Rainfall Calibration will now appear in the list with Edit and Delete options available.
Summary
Section titled “Summary”This article covered how to apply a calibration from a template in Orion Data, using the DTW Calibration and the 9am Rainfall Calibration as examples. Both processes follow the same general flow: select a template, complete any required configuration groups, and apply the template to the device. Templates that include multiple configuration groups require each group to be configured before the template can be applied.
Next Steps
Section titled “Next Steps”- Review the applied calibration to confirm sensor data is being transformed as expected
- Edit the calibration if adjustments to the configured values are needed
- Apply additional calibration templates to other sensors on the device if required
- Explore creating your own calibration templates for reuse across multiple devices
Related articles
Section titled “Related articles”- Calibrations and sensor values
- Creating a calibration template
- Managing calibrations on a device
- Working with soft sensors in Orion Data